Phone
How to Safely Remove a Cracked Screen Protector
Mar
A cracked protector might seem like a small issue… but leaving it on too long can cause real problems. Sharp edges can cut your fingers. Loose pieces can scratch your actual display. And visibility gets worse by the day.
To safely remove a cracked screen protector:
- Power off your device
- Assess the damage
- Cover the cracks with tape
- Apply gentle heat
- Lift the edge with a plastic card
- Peel slowly and steadily
- Clean your screen
This guide walks you through exactly what to do, how to prevent it from happening again, and everything else you need to know.
Steps to Safely Remove a Cracked Screen Protector
The process matters more than the tools you use. Rushing this or doing it wrong can turn a minor inconvenience into a costly screen repair. Here is how to do it right, from start to finish.
Step 1: Power Off Your Phone
Before you touch anything, turn your phone off completely. This is not just about protecting your screen. Powering off reduces the chance of accidental touches, improves visibility for cleaning, and lowers the risk of static or moisture interacting with your electronics. Think of it like turning off a car engine before checking under the hood. You wouldn’t skip that step, so don’t skip this one either.
Step 2: Assess the Damage
Not all cracks are the same, and your approach should match what you’re working with.
- Some protectors have hairline cracks fine lines that are still mostly in one piece
- Others have a spiderweb pattern spreading from a central impact point
- Some are fully fragmented with multiple pieces that may shift when touched
- The more fragmented the protector is, the more carefully you need to lift it
Take 30 seconds to look closely before doing anything. It will save you a lot of trouble down the line.
Step 3: Cover the Cracks with Tape
This step is one that most people skip, and it’s honestly one of the most important ones. Place large strips of clear sticky tape over the cracked areas to hold the broken pieces together before you start peeling. This keeps the glass from scattering all over your desk — or worse, falling into the gaps around your screen.
Think of it like putting a bandage on before doing anything else. You are not fixing the problem, but you are making the next steps a lot cleaner and safer. It also gives you something to grip when you start lifting.
Step 4: Apply Gentle Heat
Here is where things get a little technical, but don’t worry it’s easy. Use a hairdryer set to its lowest heat setting and hold it about six inches away from the screen. Keep it moving back and forth for about 15 seconds. What the heat does is soften the adhesive underneath the protector. Once that adhesive softens, the whole thing lifts much more easily. Do not point the heat at one spot for too long. Hot spots can damage your display permanently, and that’s exactly what you’re trying to avoid.
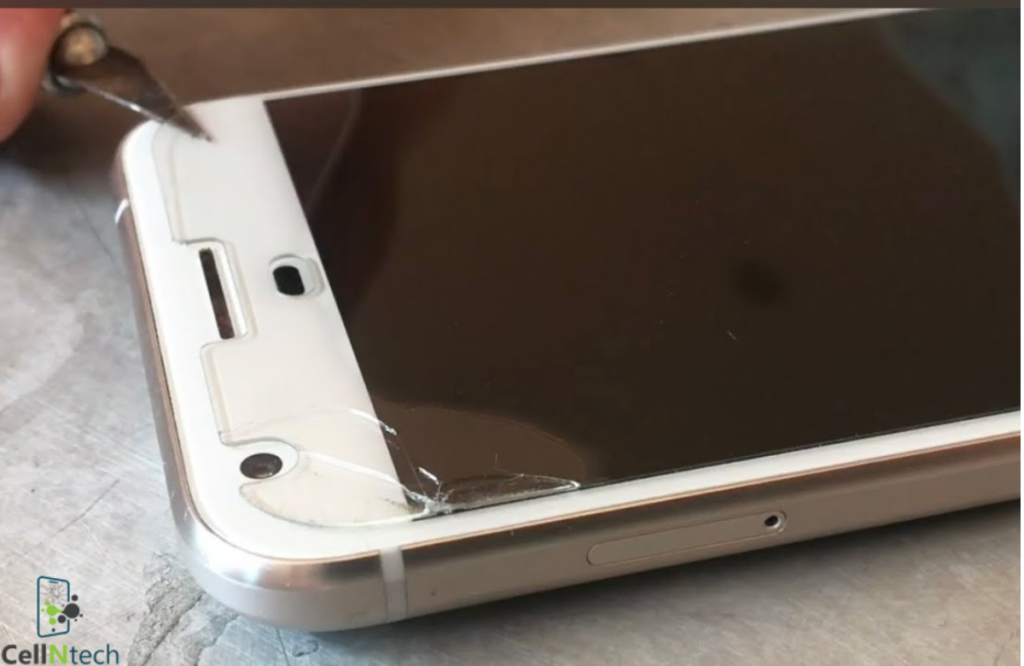
Step 5: Lift the Edge with a Plastic Card
Once the adhesive has softened, grab an old credit card, gift card, or even a guitar pick. Use your fingernail or a toothpick to carefully lift one corner of the protector first. Then slide the card underneath that edge.
Do not use a metal object. Metal will scratch your actual screen, and that kind of damage doesn’t go away. The goal here is to create a controlled starting point not to pop the whole thing off at once. Start at a corner, not the middle.
Step 6: Peel Slowly and Steadily
Now for the part everyone wants to rush. Don’t. Once you have a grip on the edge, lift and peel the protector away slowly. Keep the angle low almost parallel to the screen surface. Pulling straight up is a really common mistake. It can snap tempered glass protectors into shards that scrape across the real display on the way out. A slow, shallow peel angle lets the adhesive release on its own terms without causing drama.
Take your time here. Seriously, this step is where most people mess up.
Step 7: Clean Your Screen
You are almost done. Once the protector is off, use a microfiber cloth to gently clean the screen surface. If there is adhesive residue left behind, slightly dampen the cloth with water or use a screen-safe adhesive remover. Do not use household cleaners, rubbing alcohol, or paper towels. Those can damage the oleophobic coating on your screen the coating that makes your display feel smooth and resist fingerprints. You don’t want to ruin that right after going through all this effort.
10 Tips for Preventing Your Screen Protector from Getting Cracked
Now that the old one is off, let’s make sure the next one lasts. Prevention is always cheaper than replacement. Here are ten habits that actually make a difference.
1. Choose a High-Quality Protector
Not all screen protectors are made equal.
- Look for tempered glass with a hardness rating of 9H or above
- Avoid super cheap options they crack at the slightest impact
- Reputable brands test their protectors under real-world conditions
- A good protector costs a little more upfront but saves you way more in the long run
You genuinely get what you pay for here.
2. Apply It Properly from the Start
A screen protector with bubbles or poor alignment is structurally weaker at those problem spots.
- Clean your screen thoroughly before applying
- Use an alignment tool if your protector comes with one
- Take your time rushing the installation is how most protectors get damaged early
- Smooth it out from the centre outward to push air bubbles to the edges
A good installation can seriously extend the life of your protector.
3. Use a Phone Case Alongside It
A screen protector alone is not enough protection.
- A case absorbs shock from drops before it reaches your screen or protector
- The two work as a system, not as alternatives to each other
- Look for a case with raised edges around the screen for extra drop protection
Using one without the other is like wearing a helmet but skipping the seatbelt.
4. Avoid Dropping Your Phone Face-Down
This sounds obvious, but how you set your phone down matters more than you think.
- Avoid placing your phone face-down on hard or rough surfaces
- Even repeated light contact can create micro-abrasions over time
- Get into the habit of always placing your phone screen-side up
It’s a small habit change that makes a real difference.
5. Keep It Away from Keys and Coins
Your pocket is not your phone’s friend when it’s sharing space with metal objects. Keys and coins are harder than your screen protector. Even a few seconds of friction in a pocket or bag can create scratches that weaken the glass over time.
Here is a real scenario: someone always throws their phone, keys, and loose change into the same jeans pocket. A few weeks in, they start noticing tiny scratches spreading from one corner of the protector. Then one small drop finishes the job. That is not bad luck that is pocket damage, and it is completely avoidable. A separate pocket for your phone takes zero effort.
6. Don’t Ignore Small Cracks
- A small crack might seem harmless at first
- Once the glass is compromised, the whole protector loses structural strength
- The next minor impact or even normal pressure can shatter it further
- Swap it out early and avoid the messier removal process later
Catching it early is always the smarter move.
7. Handle Your Phone with Clean Hands
Oils, grit, and everyday dirt sit on your protector surface all day long.
- Over time, they wear down the coating and weaken the glass
- They also attract more dust and debris that acts like sandpaper
- A quick wipe with a microfiber cloth daily is one of the easiest habits you can build
It takes five seconds and makes a noticeable difference.
8. Avoid Extreme Temperatures
Extreme heat and cold are both bad news for screen protectors.
- Leaving your phone in a hot car weakens the adhesive underneath the protector
- Severe cold can make the glass more brittle and prone to cracking
- Once the adhesive degrades, the protector lifts at the edges and becomes vulnerable
Keep your phone at room temperature as much as you reasonably can.
9. Don’t Press Too Hard on the Screen
Heavy swiping and hard presses might feel normal, but they add real stress to the protector.
- This is especially dangerous if there are already small, invisible cracks
- Pressure from typing hard or using a stylus at force concentrates stress on the glass
- A lighter, more deliberate touch protects both the protector and the display underneath
Your screen is more sensitive to pressure than most people realise.
10. Replace It Regularly
Even without visible damage, screen protectors do not last forever.
- The coating wears off with daily use
- The adhesive can degrade and cause edge lifting
- Micro-scratches accumulate and weaken the surface over time
- A replacement every six to twelve months keeps your protection level where it should be
Think of it like changing a toothbrush. Just because it still works doesn’t mean it’s doing its job properly.
Conclusion
A cracked screen protector is not the end of the world. It does need to come off, though and sooner rather than later. The process to remove a cracked screen protector is simple when you take it step by step: power off your phone, assess the damage, tape the cracks, apply gentle heat, lift from a corner with a plastic card, peel slowly, and clean up properly. Do it right, and your actual screen stays safe underneath.
From there, pick a quality replacement and build the small habits that keep it in one piece. Your phone goes everywhere you go. A little care goes a long way in keeping it protected.
And if anything ever feels too risky to handle at home, taking it to a professional at Cell N Tech is always the right call.
Frequently Asked Questions
Is it safe to peel off a screen protector?
Yes, it is safe as long as you do it carefully.
- Power off your phone first
- Use a plastic card or your fingernail to lift an edge never metal tools
- Peel slowly at a low angle to avoid scattering glass shards
- Apply gentle heat beforehand to soften the adhesive and make it easier
Rushing it or pulling straight up is where things go wrong. Take your time and it is a straightforward process.
Can I take off a screen protector and put it on again?
In most cases, no and it’s not worth trying.
- Tempered glass protectors lose their adhesive strength once removed
- Dust and air bubbles will get trapped underneath during reapplication
- The protector may not sit flat or adhere properly the second time around
- If it was cracked, there is no scenario where reapplying it makes sense
Some plastic film protectors are technically repositionable, but even those work best when replaced fresh.
What are the signs that a screen crack is worsening?
Here is how to tell if the damage is spreading:
- The crack lines are visibly longer than they were before
- New lines are appearing from the original impact point
- The glass is lifting or separating at the edges
- You can feel texture or sharpness when you swipe across the surface
- Pieces are shifting or moving when you apply light pressure
If you notice any of these signs, stop using the phone as normal and remove the protector as soon as possible. The longer you wait, the messier it gets.
